For one of my birthdays a few years ago, I was given a Nintendo Wii along with the full Rock Band setup. Guitar, of course, drums and a microphone. The game is great, but in the fullness of time the guitar broke down. It was wireless and stopped pairing with the dongle on the Wii. The drums are excellent fun, but team play needs a lead guitarist.
The guitar was put in a cupboard and quietly forgotten until a conversation at work reminded me. It’s already broken. I can’t really make it worse by having a poke around with a multimeter.
Research and exploratory surgery
A search for syncing issues turned up a forum comment where someone fixed their problem by adding extra voltage, which made them think the power supply was on its way out. It’s not the same model of guitar, but a degraded component could explain my problem. Not bad enough to kill the unit, but too much interference in the power to let the radio work well.
Opening the guitar was simple. There are guides to this online, but I know a likely looking screw when I see it and the back comes off easily. Although that is where the battery pack is the cables are long enough to set the pieces side by side and they don’t get in the way.
The main board is obviously the biggest piece of printed circuit inside the case and it has what appears to be a daughterboard that is the wireless module. A search on the module name gave me the user manual. If nothing else, maybe I can salvage the daughterboard for a bit of wireless arduino fun.
Looking at it, I can see three relatively large capacitors which I associate with power supplies. Testing a capacitor with a multimeter is straight forward: I cranked it to 2MΩ, touched both pins with a single probe to be sure I’d discharged the capacitor then one probe on each pin. The multimeter runs a small charge through the component when it’s testing resistance and when you test a capacitor like that it shows as a gradually increasing resistance as it charges.
Two of the capacitors behaved as we expect. I don’t know enough to determine if the charging rate was perfect, but the third capacitor read as a complete short. Definitely our prime suspect.
It could be the capacitor is faulty, or it could be there is a short in parallel with it that’s making the capacitor look faulty. To test this I desoldered it from the board. No easy task. My iron isn’t ideal and the component itself acted as a heat sink. However I worked it free and was able to definitively test it to prove it was broken.
But it wasn’t.
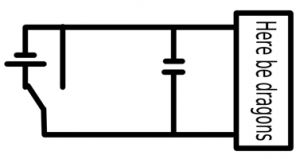
Tested in isolation the capacitor worked like the others. More investigation showed the power supply, when turned off, shorts the positive and negative lines. Since this capacitor seems to be attached to those lines, perhaps to bring the power up in a controlled manner, the short through the battery switch was the preferred connection and my in-circuit test of the capacitor was flawed.
It seemed unfair to leave this capacitor homeless while I poked some more, so I soldered it back into place while I thought. I flicked the power back on to make sure it was not worse than before and it worked! Just for a second. But it definitely connected. Maybe something is up here after all.
New plan: Replace all of the capacitors on the board and see if that solves the problem.
Despite being relatively large, the capacitors are still very small. 3mm diameter small, and the smallest ones I can find online with the same capacity and voltage are 5mm. Fortunately there’s a sizeable amount of air inside the guitar so as long as they fit on the board, they shouldn’t cause a problem. At six pence each and free postage they are worth trying out. Next post is pending an Amazon delivery.


